AutoDoc
AutoDoc is an experimental feature of RapidGPT. It's important to be aware of some key limitations at this stage. Firstly, the feature is not capable of processing files that exceed 6000 characters. Additionally, it might encounter difficulties with projects that consist of more than 20 files. These limitations are estimated and could vary depending on specific user scenarios.
🛠️ Continuous Improvement: Our team is diligently working to enhance this feature. Our aim is to address and reduce these limitations, striving towards a more comprehensive and robust experience in the near future. Your understanding and patience as we refine RapidGPT are greatly appreciated.
Summary
AutoDoc automatically generates comprehensive Sphinx-based documentation for your hardware projects, saving you time and ensuring accuracy and consistency. It seamlessly integrates into the RapidGPT environment for a smooth workflow.
Benefits:
- Saves time by automating documentation creation.
- Keeps documentation up-to-date with your code changes.
- Provides a consistent style across all project documentation.
- Integrates seamlessly with RapidGPT for a user-friendly experience.
How AutoDoc Works:
- Code Analysis: AutoDoc scans your project's code to understand its structure and components.
- Logical Organization: It organizes the content logically into sections, subsections, and topics.
- Detailed Descriptions: It generates detailed and accurate descriptions of your project's components, functions, and usage.
- Sphinx Formatting: It formats the content for a professional and user-friendly Sphinx documentation website. Get Started:
Get Started with AutoDoc
To generate a full documentation website for your project, follow these steps:
1. Open a Verilog File
Open a verilog file in VS-Code. For this tutorial, we'll be opening the file "ram.v" as created Your First Project tutorial
2. Open Command Palette in VS Code:
- Open the Command Palette with Cmd+Shift+P (MacOS) or Ctrl+Shift+P (Windows/Linux), then select 'RapidGPT: AutoDoc' to activate the feature, initiating the combined process of syntax checking and automatic error correction.
- Alternatively, below the RapidGPT chatbox window, click on "COMMANDS" and select "AutoDoc" from the dropdown menu to use the feature.
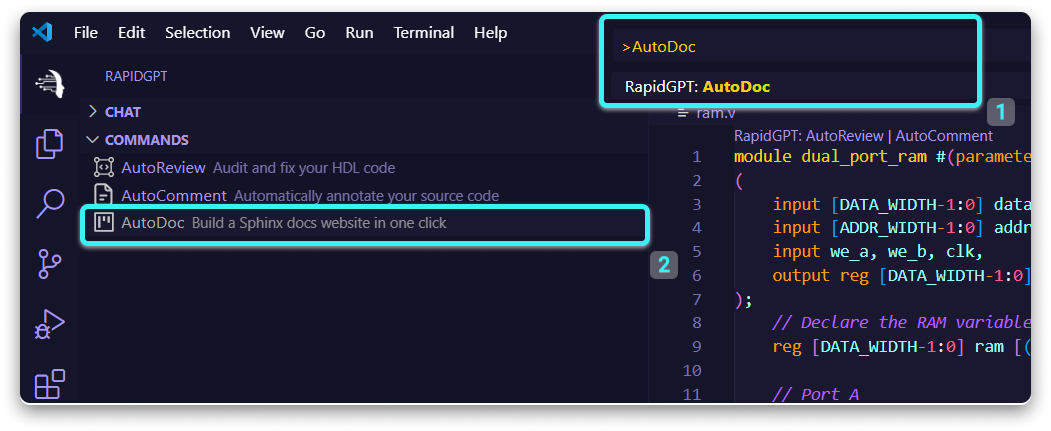
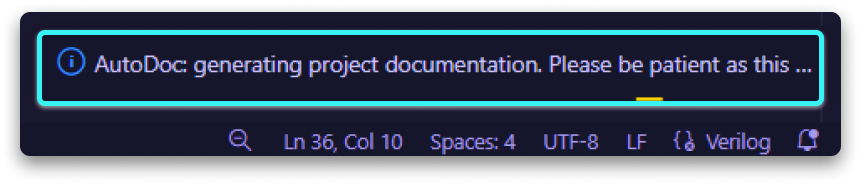
After clicking on the AutoDoc feature, RapidGPT initiates the process of AutoDoc indicated on the bottom right corner.
3. Automatic Generation:
AutoDoc will meticulously scan your entire project and automatically generate a docs folder. This folder will not directly contain the final documentation website, but rather the essential source files needed to build it. These files include reStructuredText documents, Makefiles, and a requirements.txt file specifying necessary Python dependencies. To compile the website, it is recommended to use a virtual environment such as Conda, Miniconda, or venv to avoid any conflicts with global dependencies.
Navigate to the docs folder using the command
cd docs
Once inside your local environment, install the required dependencies by running
pip install -r requirements.txt
Then, generate the website by executing
make html
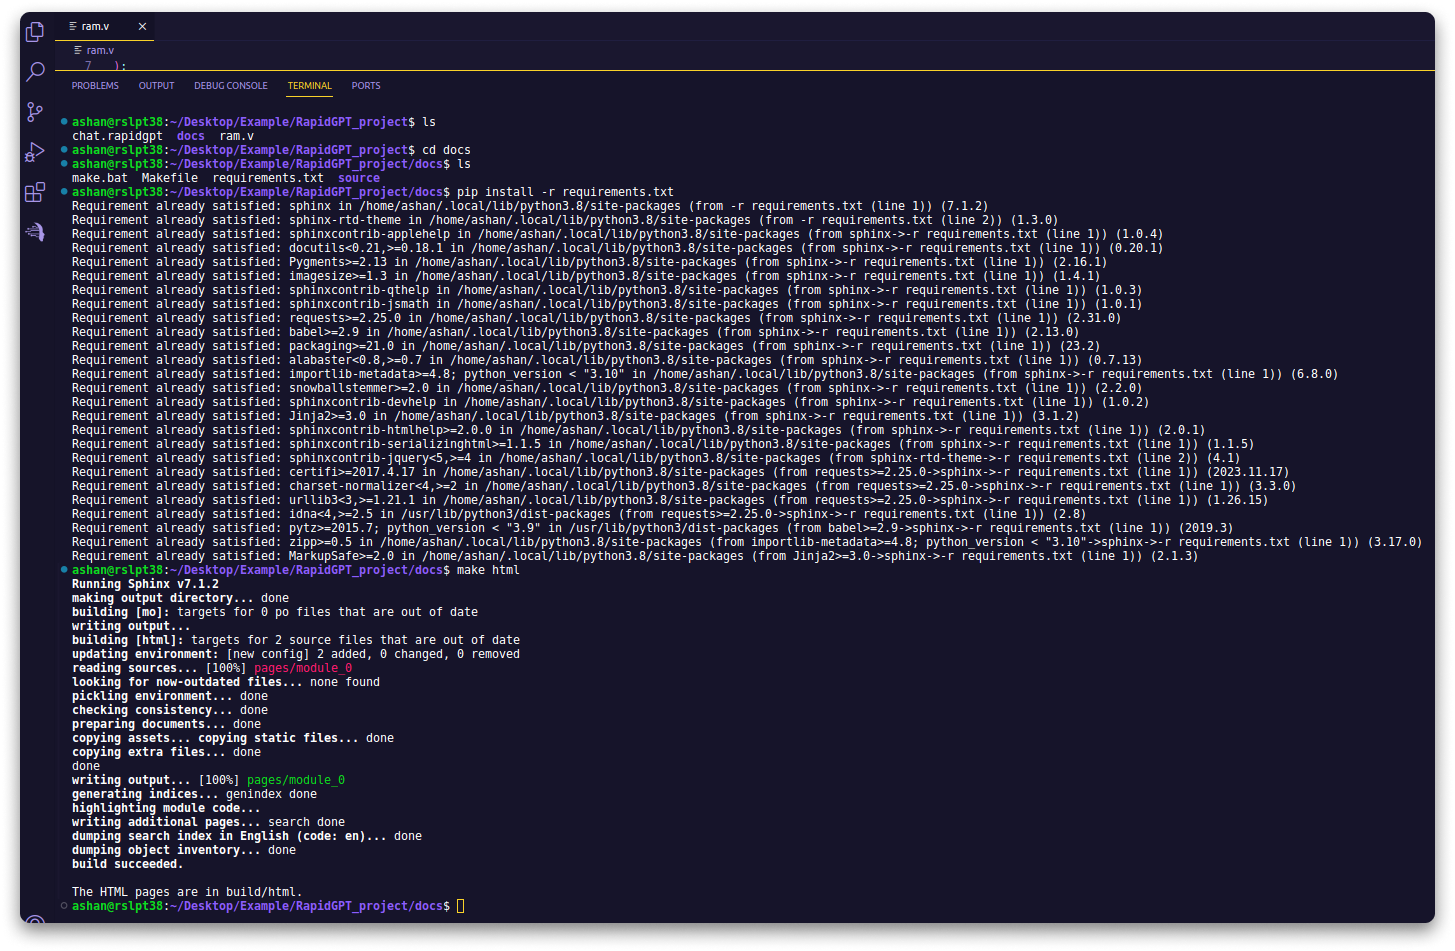
This process will produce a set of HTML files within the docs/build/html directory. You can access your documentation website by opening the docs/build/html/index.html file generated during this process.

4. Review and Deploy:
After the process is complete, you can review the generated documentation and make any necessary adjustments before deploying it as a website.
By leveraging AutoDoc, you can efficiently create detailed and aligned documentation for your entire project, enhancing both development and maintenance processes.